Image Manipulation Series - ImageMagick
Image Manipulation Series
Part One: ImageMagick
Part Two: Binaries For Optimization
Part Three: Keyboard Maestro Image Editing Suite
Part Four: Markdown Image Links
Outline
It has been awfully silent on RocketINK lately, I’m doing something about it and the first thing is to kick off a small series which deals with automating image manipulation. So, part one in this series is the introduction where we will set the table to have everything ready for the good stuff aka a sweet set of macros and scripts.
My mission here is to take away the fear of running some geeky image processes tool in the shell. The geeky UNIX based image toolset I’m referring to is ImageMagick. It’s indeed quite powerful and super versatile, but for basic operations you don’t need to know much and in this post I will walk you through the installation and show you some basic commands.
ImageMagick - The Swiss Army Knife
ImageMagick is my go-to utility for swiftly converting images to JPG or PNG, resizing them and to prepare them for sharing. I have it running on my beloved Uberspace server (actually it’s RMagick - a ruby version of it) for some automatic processing in the background and of course I still use it in combination with Hazel on my Mac.
Installing ImageMagick
The hardest part though is, to get ImageMagick installed on your Mac and to learn the basics. Gladly, since ImageMagick has been around for years, the Internet is full of useful examples. The good thing is, once you know what you want and which types of actions you repeat more or less often you’re set.
Option 1: Easy One-Click Installation
If you want to keep the amount of Terminal.app™ action to a minimum this is your lucky day. The guys over at Cactuslab have put together a installer which gets you started in no time:
To simplify the process of installing ImageMagick on Mac OS X, Cactuslab has put together an installer package. The installer puts ImageMagick into
/opt/ImageMagickand adds it to yourPATHby creating an entry in/etc/paths.d/.
Go download their ImageMagick installer for Mac OS X. You can go with any of the packages, for our purposes the one with Ghostscript would be the best choice since one of the ImageMagick commands is relying on it.
I’d still recommend using a package installer. It’s easier to maintain and sooner or later you will pay the command-line a visit (or two).
That said, this is as easy as it gets. Back in the days Apple hosted an installer on their official site in the Unix and open source section. Now Cactuslab got you covered. Note: there’s also an installer hosted on MacUpdate but judging from the comments I don’t know if it’s the most recent one.
Option 2: Homebrew
If you feel comfortable with the shell, Unix tools and alike you probably already have one of the more popular package managers like Homebrew, MacPorts or Fink installed.
Personally, I use Homebrew and I’d recommend using this method over the one-click solution. Using a package manager brings several advantages to the table, c.f. a straight forward process to update you ImageMagick with a simple brew upgrade imagemagick.
So, here’s step by step guide for installing Homebrew:
(1) Install the Command Line Tools in Mac OS X. I’ve heard that since Mavericks you won’t need to install Xcode from the Mac App Store upfront. I can’t confirm it since I already had Xcode installed, but you can give it a try; just open the Terminal.app (in /Applications/Utilities/) and type:
xcode-select --install
If you’re not sure if you might have already installed them you can check if you get a valid path by pasting xcode-select -p in the Terminal.
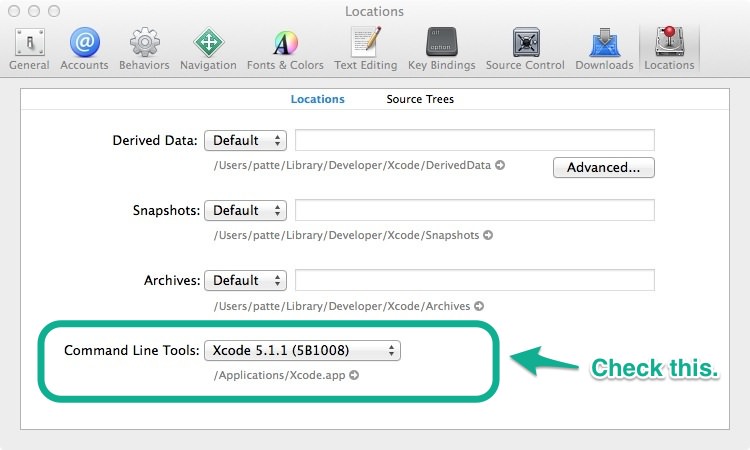
In case the trick without Xcode didn’t work it couldn’t hurt to check if the latest and greatest you just downloaded are actually selected:
(2) Install Hombrew by opening Terminal.app and pasting in the following:
ruby -e "$(curl -fsSL https://raw.github.com/Homebrew/homebrew/go/install)"
Some ImageMagick extras need XQuartz to be installed as well. To be on the safe side I suggest to go ahead and just download it from their page and install it.
(3) Optional: here are some basic brew commands:
- Check if everything is working:
brew doctor - Update Homebrew:
brew update - List all installed packages:
brew list - Remove an app:
brew remove <app>
For the full list of commands check out the man page man brew. Homebrew keeps everything nicely tucked away in a separate directory (/usr/local/Cellar/) and then symlinks the files into /usr/local.
(4) Install ImageMagick:
brew install imagemagick
Option 3: MacPorts
On the ImageMagick website they officially recommends MacPorts. I’ve used Homebrew without a problem, but anyway, here’s the MacPorts guide:
(1) It’s the same as with Homebrew. Have a look at the step one above.
(2) Head over the the MacPorts site and download the installer from their download section.
(3) Open Terminal.app and type:
sudo port install imagemagick
Option 4: Fink
It’s been a while since I used Fink, but if you’re in that camp. A simple fink install imagemagick should do. If you haven’t installed Fink here’s the quick start guide.
Option 5: Install The Binaries Yourself
On the official ImageMagick website they have all the instructions you need to “Install from Binary Distribution” . Check out their tutorial if you’re a self-made man.
Testing The Waters – Basic Examples
These examples are some of the functions I’ll use in the upcoming macros and scripts. In case you want to modify those you first need to know what they do. I’ve been adding options to the macros which allow you to control certain aspects of a workflow, but I can only add this much. At some point it would get much to crowded.
This is why I wrote this reference section. If you grasp the basics it will be much easier for you to modify my macros or to write your own custom tailored workflows.
To get you started put a example folder called “demo” on your desktop and put some images in it or download this one.
If you downloaded the folder you now have these six images:
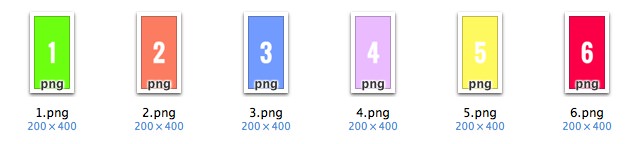
Open Terminal.app and cd into that folder:
cd ~/Desktop/demo
Where’s My ImageMagick?
First things first; you probably want to know where ImageMagic is located. Therefore type convert. Depending on the installation method you ImageMagick will be located at one path or another. Mine is at /usr/local/bin/ and if you went the Cactuslab route then yours should be at /opt/ImageMagick/bin/.
If you don’t get a valid path displayed then something went wrong with your installation or more likely the path isn’t linked to /usr/local.
In another post of this series you will need that path, now you know how to get it. In short: if you want to use a ImageMagick command (or script) in apps like Keyboard Maestro or Hazel you will likely need to specify the path first.
Converting Files Into Another Format
ImageMagick can do tons of things. I figured converting images from format A to format B is a common task, so most examples here focus around this aspect of image manipulation.
Converting A PNG Into A JPEG
convert 1.png 1.jpg
With the convert command you have to specify the name of the output file.
Convert All PNG’s To Sequentially Numbered JPEG’s
convert * demo.jpg
… will output demo-1.jpg demo-2.jpg demo-3.jpg …. With the asterisks (*) we say that we want to use all files in the current directory. It’s the same like writing this:
convert ~/Desktop/demo/*.png demo.jpg
That’s for the numbering out of the box. Still, we can do better. Especially if you plan to batch convert hundreds of pictures you may want to specify how many digits the sequence should have. We can use %02d like so:
convert * demo-%02d.jpg
This will output demo-00.jpg demo-01.jpg demo-02.jpg ….

Using %03d would give you demo-000.jpg, demo-001.jpg, ….
In case you want to start from a specific point you can do so by adding the option -scene <number>. In the example below we start from one instead of zero.
convert -scene 1 * demo-%02d.jpg

Mogrify, who?
mogrify is essentially the same as convert, but you can use it to keep the original file name when processing images.
To stick with the example from above our conversion command would look like this:
mogrify -format jpg 1.png
mogrify makes it easier to batch convert all files in a folder if you want to keep the original name.
mogrify -format jpg ~/Desktop/demo/*.png
If you wanted to do this with convert you’d have to wrap the command in a loop and run it on each file in the folder:
for i in ~/Desktop/demo/*.png; do convert "$i" "${i%.png}.jpg"; done;
The bottom line is, decide first how your output files should be named and then decide on which to use before ending up with a complicated script when you don’t have to.
Adding Optional Parameters
-quality <value>
Let’s say the really need some lightweight quick and dirty JPEG’s for sharing our latest and greatest which we rendered as a PNG. Often times a simple 1024x1024 px PNG image can weigh over 2 MB. In addition, we may just want a client to see the rough idea rather than show him all the glorious details which still miss the finishing touches. What I want most times is a low resolution JPEG for the first few drafts to steer us in the right direction (… this also tends to help keeping long discussions about prominent features which are still in the making down to a minimum. The intend is clear: this is a rough mockup.)
When using the value parameter 1 is the lowest and 100 is the highest:
mogrify -format jpg -quality 30 ~/Desktop/demo/*.png
or
convert -quality 30 -scene 1 *.png low-quality-%01d.jpg
Congratulations, all PNG files in your demo folder are now rendered as ugly bunch of JPEG’s.
-resize <width>x<height>
The resize parameter in its basic form allows you to shrink or enlarge images. The way resize works is, it keeps the ratio intact and enlarges the until the first criteria is meet.
Our demo pictures are all sized 200x400 px. When we use…
convert -resize 800x800 ~/Desktop/demo/*.png larger.png
… it will upsize our images to 400x800 px since the height first hit the 800 pixels mark.
This time we used convert instead of mogrify. If we would have used…
mogrify -resize 800x800 ~/Desktop/demo/*.png
… mogrify would have replaced all PNG files in the demo directory with larger versions.
If you only want to resize your image up to a specific width you can use -resize <width>. The same is possible with only using the height parameter. Here we’d have to add an “x” -resize x<height>.
convert -resize 800 1.png 1-larger.png
The dimensions of 1-larger.png would be 800x1600 px since we’re only specifying the height.
convert -resize x800 1.png 1-larger.png
With the command above we’d end up again with a 400x800 px image.
Resize with both parameter (width and height) is great if you have a mixed folder of landscape and portrait pictures and want to resize them to a certain threshold.
I often use it when shrinking images, c.f. the images in my blog shouldn’t be wider than 640 px and not taller than 800 px.
The thing is, when I’d go ahead do…
convert -resize 640x800 1.png 1-larger.png
… our demo images would get enlarged. I don’t want that. Gladly, there’s small trick which disables enlarging images. Add \> after the specifying the width and height.
convert -resize 640x800\> 1.png 1-larger.png
-append
You can append images horizontally or vertically.
convert +append *.png horizontal.png

convert -append *.png test.png

If you want a bit of padding between the images you have another parameter called -splice. Since splice will add this padding to each side of an appended image we would end up with a border on one site. To avoid this we have to crop the final image.
Horizontal version:
convert *.png -splice 10x0 +append -crop +10+0 horizontal.png
Vertical version:
convert *.png -splice 0x10 -append -crop -0+10 vertical.png
Keep an eye open open with the different -/+ signs. Another thing to keep in mind is that the arguments are lined up in a logical order:
1) convert *.png → convert will target these source files
2) -splice 10x0 → apply a padding to all files
3) -append → append all images horizontally
4) -crop +10+0 → crop after images got appended
5) vertical.png → write the target file with that name
So, depending on what you want you’ll have to pay attention where to put a certain option/parameter. If you wanted to resize the final image, make it a JPEG and modify the quality all this would go after the crop.
convert *.png -splice 10x0 +append -crop +10+0 -resize 320 -quality 33 horizontal.jpg
The example code above will shrink the final image. Unfortunately there’s a stumbling block: this also means, that your padding will shrink (-̩__-̩).
You can work around this if you resize the images first. But, you have to do the math… which gets annoying pretty fast. For instance if we wanted our 6 demo images to have the 10 px padding and the resulting image of an append action be 640 px, we would have to do the following calculation:
target width = 640
width per image = 200
amount of images = 6
padding = 10
x = (target width - (amount of images - 1) * padding)/amount of images
=> 98.3333
To check if this result is correct:
Final image = x * 6 + (5 * padding) => 640
Ergo, each image should get resized to 98.3333 pixels:
convert *.png -resize 98.3333 -splice 10x0 +append -crop +10+0 -quality 33 horizontal.jpg
Later on we will find out how to simplify this process with a script.
Documentation & Links
Of course the possibilities with ImageMagick don’t stop there. The official documentation is huge…
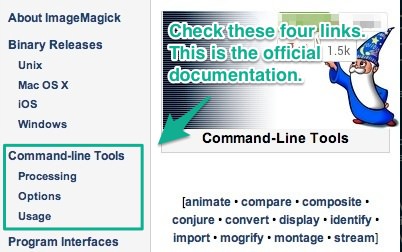
… and like I stated in the beginning there are literally thousands of pages on the Internet that will give you examples on how people use this toolkit for all possible kind of stuff.
Here are some links to get you started if you want to go beyond the basics:
- ImageMagick (official website)
- Fred’s ImageMagick Scripts
- ImageMagick Forum
- Stack Exchange Network