November 18, 2014

If your iPhone is your main camera and you shoot a ton of pictures you probably know the drill: at some point there are just too many pictures and you are the person in charge to clean up this mess before you share them to family and friends.
Photo management has become easier in the last years. Several iOS apps now offer automatic uploading of your latest and greatest. Personally, I’m a fan of CameraSync because it allows you to setup a naming scheme of your own. Plus, it offers background location sync, meaning, if I return home the app recognizes my trusted ol’ WiFi network and the photos I took get automatically uploaded to my preferred destination.
In the App Store description of Camera Sync there’s a quote from Lifehacker.com:
Call me lazy, but I don’t like plugging my phone into my computer just to get all my pictures. CameraSync fixes this annoyance by wirelessly sending all new photos you take to Dropbox [or] Flickr, Amazon S3, SkyDrive, an FTP server or Box.net….
This is exactly me. Shooting away, auto-uploading and just being lazy about it.
For me, one problem remains with this approach: I end up with a ton of pictures which I don’t want to archive anyway. My Mac with its 24″ display attached to it is perfect for plowing through pictures and getting rid of them. Still, the last time I sorted my pictures was 6 months ago. This is downside of being lazy. I tend to defer this task because when I’m at it, I will also edit the pictures to have them ready to share. With editing being time intensive this leads to a vicious postponing circle.
Working in batches is fine - it would even be better if I do it monthly (which was my initial intention) - but wouldn’t it be even better to pre-filter pictures manually by hand even before uploading them with CameraSync? After all our phones are bigger now and have such a nice display. The upload would be faster without the additional ballast.
Well, now we can do it in the most easiest manner: meet Cleen and enjoy triaging with swipe gestures.

Cleen is a free iPhone app and was made by the same team who brought the nifty cloud-based photo book app tapsBook to the iPad. Cleen is equally clever and has three interactions to assist you:
- Swipe up: mark as favorite = keep your photos.
- Swipe down: mark as trash = prepare for batch deletion.
- Swipe left: postpone the final decision and act-on the photo later.

The workflow is much like the one from Triage (the self-titled Email First Aid Kit). Cleen applies this gesture driven fast filing system and let’s you sort out unwanted photos.
At any point you can drag a faved or trashed photo back to main area for revision.
Once your done, you can delete all files at once… and they will vanish from your iPhone’s camera roll.
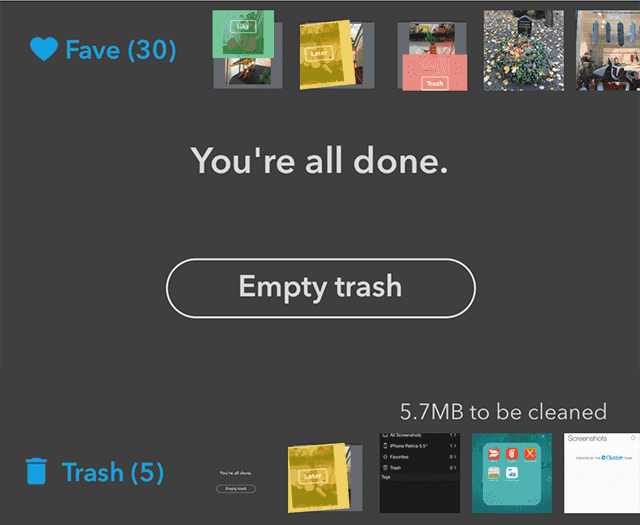
The last part is actually the exciting part. Cleen is the first app I saw using this new iOS 8 feature and I can’t wait for a screen shot app which makes use of this feature. Screenshot Journal and I Love Screenshot can already copy screen shots to dedicated folders, but being able to move (or copy + delete) would be make those apps much more useful for bloggers.
The one minor issue is that I’d have wished for a more trimmed down UI where I can see more of my photo. To work around smallness of the cards which representat of your photos, you can tap and hold to zoom in on a photo. I would also like an option to just “keep” a photo instead of marking it as a favorite. Marking a photo for reviewing “later” keeps the photo and doesn’t add it as a favorite. So there’s kind of a workaround already build-in.
Currently you can’t select a default folder in the settings. If working with the cameral roll is your main use case for Cleen, you’ll have to swipe all the way to its folder first. Having an option to open Cleen with a default folder would be a nice little time saver.
Cleen is not optimized for the iPhone 6 (Plus) yet. But my guess is that it won’t take long until an update is available which adds support for it.
In short, I think Cleen is excellent and does a stellar job at simplifying a crucial step of photo management: taking out the trash.
November 14, 2014
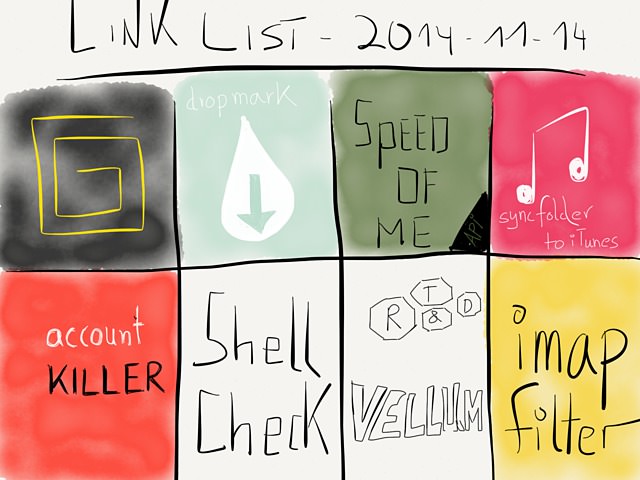
- The Grid
- A really cool teaser of what looks at least 10 times better than Squarespace.
- dropmark
- I’ve tweeted about dropmark some time after they launched. I still wonder why it doesn’t gain more traction. It’s feature set is up to par with CloudApp, and when they add tagging and a search function soon dropmark could be one of the big three.
- API – SpeedOf.Me
- A HTML5 and JavaScript speed test which can measure download speed, upload speed, latency and jitter. Yep API-support √. Pretty Nice. Alternative: this speedtest-cli tutorial.
- syncfolder2itunes
- Smart idea. AppleScript which syncs a folder to iTunes (= hook it up with Hazel). Translation: “A small script which which imports a configurable folder into iTunes and also cleans-up your media library if a track isn’t available anymore”.
- accountkiller.com
- »How to easily delete your online accounts.« God lord, why didn’t I find this page earlier.
- ShellCheck – Online shell script analyzer
- Kind of a validator for shell scripts.
- Vellum
- If you’re a nuzzle addict on iOS, this is basically the same just as a web. Of course you could also use nuzzle on the web. Now you got two options.
- lefcha/imapfilter
- If I ever have to leave
maildrop` behind this is what I’d use.

One of my dad’s passions is cooking. He used to write up recipes in MS Word, print them out and collect them in a folder. Some of those sheets he shared with his friends and family. In the last years he was active in various forums and a blog turned out to be the easiest way to get his information out.
At first “blog” was only the magic word, he built websites with RapidWeaver for each of his projects. This wasn’t the solution, he moved on and tried Google+ and Facebook. The social network approach was nice, because he got some likes, but there was no real interaction and the own brand, so to speak, was missing. He was used to click plugins and expect everything to work and be customizable.
After this forth and back I suggested using Markdown for the tenth time and set up a WordPress installation for him. It’s a new world for him and he struggles getting WordPress configured to do what he wants to do. Again the RapidWeaver plugins where a tad easier to use and often times I get a mail with “nothing works – gonna quit soon (again)”.
It’s frustrating to watch since live could be so easy. I only have to find a simple blogging platform that just works for him. It should be one that’s easy to understand, customized and manage – especially handling pictures.
Whatever I eventually will come up with, there’s a good chance Markdown will be involved. It’s just the best way to write on the web – there’s no arguing in my opinion.
But Markdown is a barrier for people who hear it for the first time. What to do about it? Well, we’re heading straight for the holiday season I thought to myself “what better to do than to put the gift of Markdown under the tree”.
There are gazillion articles on the web which explain it. But I think there’s a better way:
Creating Content with Markdown: Learn by Video: Simple, future-proof writing with plain text by Brett Terpstra (currently $37.45). Instead of a DVD you can also watch in online on Peachpit. It’s 56 min full of Markdown.
Brett has built several Markdown utilities over the last decade. He’s the author of Marked and nvALT. In brief: it’s his thing and he’s damn good at it. Just check his blog and search for Markdown.
Now Brett’s gone back to basics and created a video which explains every aspect of Markdown.

What I hope to achieve with this gift is that my dad feels obliged to watch it. If he does, he will learn everything that’s to know about Markdown. Simple as that. A hopefully bulletproof plan since there’s no text to read and an instructor who walks him through all the obstacles.
About The Video Tutorial
Brett was kind enough to hook me up with a copy after he released his tutorial back in May. As usual when it comes to linking to the latest and greatest I’m a bit late to the party. In this case I hope it doesn’t matter too much that I skipped buzz-phase. After all, we’re dealing with a classic.
Before hitting play on the video I’ve found myself sitting with a reflective gaze traveling through the last years of me using my keyboard. I’ve been writing in different Markdown flavors for about 5 years and initially the thought that I know all the tricks was predominant. More precise: I imagined this to be a nice easy ride where I just sit back for an hour and see what people like my dad can learn from Brett’s tutorial.
My natural nerd-arrogance was casted aside and struck down after I reached a certain chapter. It’s a bit embarrassing to admit, but I actually learned some valuable “tricks”. Truth be told, with Markdown there are no tricks. It’s just how you suppose to use the Markdown syntax. I didn’t know or forgot about the tiny details that can make your life easier when writing Markdown, c.f. now I can dismiss my workaround for keeping lists intact when throwing in a blockquote or code block.
The bottom line is, it makes for a great gift but also works like a PRAM reset for users like me. Now I have a refreshed memory and can use 100% of my knowledge again.
Brett starts out nice and explains what Markdown is, who it’s for and what the benefits are. He continues how basic structuring of a document works and of course the syntax of Markdown.
A basic knowledge of HTML is recommended to understand everything, but if you follow the examples you should be fine.
One last thing: it’s also nice to know that Brett developed the same style preferences as the ones I’m using now (excluding reference style links… FoldingText and inline links rocks – it’s my personal dream team).
If you’re curious, here’s the table of content:
- 1.0 Introduction
- 1.1 What is Markdown (1:44)
- 1.2 Document Structure (2:51)
- 1.3 Headlines (2:27)
- 1.4 Bold and Italics (1:35)
- 1.5 Lists (4:49)
- 1.6 Linking (7:47)
- 1.7 Images (1:18)
- 1.8 Blockquotes (0:51)
- 1.9 Code/Verbatim (3:10)
- 1.10 Hard line breaks (0:42)
- 1.11 Style considerations (2:39)
- 1.12 Test Yourself
- 2.0
- 2.1 Markdown extensions: Footnotes (1:52)
- 2.2 Markdown extensions: Tables (1:49)
- 2.3 MultiMarkdown (3:07)
- 2.4 Discount (0:48)
- 2.5 Kramdown (1:10)
- 2.6 GitHub-flavored Markdown (1:03)
- 2.7 Other Markdown flavors and extensions (1:29)
- 3.0
- 3.1 Converting to Markdown (2:04)
- 3.2 Exporting Markdown (5:54)
- 4.0
- 4.1 Leanpub and blogging platforms (1:02)
- 4.2 Collaboration (3:37)
- 5.0
- 5.1 Byword (1:26)
- 5.2 MultiMarkdown Composer (1:17)
- 5.3 iThoughts X and iThoughts HD (0:48)
- 5.4 Scrivener (0:48)
- 5.5 Marked (2:30)
- 5.6 Simplenote (0:29)
- 5.7 nvALT (0:43)
- 5.8 Sublime Text, TextMate, and others (0:40)
- 5.9 Conclusion and additional resources (0:34)
- 5.10 Test Yourself
November 12, 2014
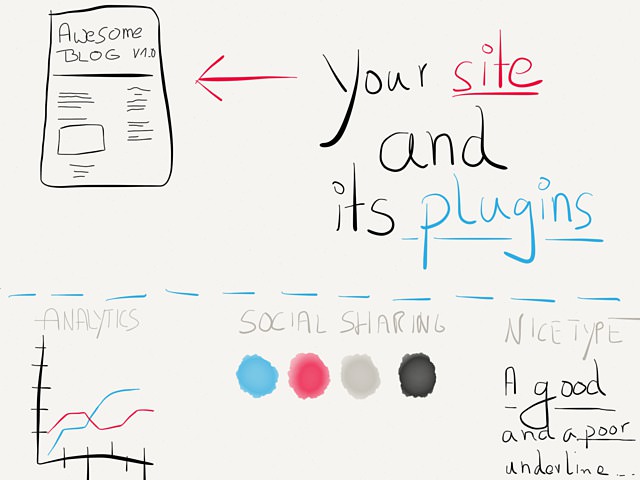
Making the Internet a nicer and visually appealing place is always a good idea. An even better one is to share how to do it.
Today I read an article about the state of underlines on the web and how they are almost as bad as this strikethrough text to do it better.
The article is called “Smarter Link Underlines For Every Website”. You should definitely read it; there’s also a nice example of how Apple’s Safari and Messages app are ahead of the curve typography-wise.
Accompanying Text
In all honesty, this was supposed to be a simple link post, but as you might know I have an ongoing struggle doing those. So, after checking that the underlines on my site looked fine as usual, decided that this topic is quite interesting and worthy of a post.
Users having more control over their own site is always a good thing. So here are more words with which you can embalm your iris.
Static sites gained popularity over the last couple of years. Recently there are popping up more services which aim to bring the convenience of WordPress plugins to the masses, no matter if you run WordPress or something else.
Two of these services I want to introduce to you today go by the name of Eager and Filament.
Why Use Them?
If you’re capable of adding JavaScript snippets to your code this might not be for you, but if you do a site for someone else – which I happen to do from time to time as a freelancer – tools like these could come in handy.
The advantage of Filament is that it’s really just one bit of JS, then the rest of the management and maintenance happens elsewhere. For a web designer/front end dev, it might seem like relinquishing control, but handing over the control to a client, giving them access to their own dashboard etc. could be seriously useful.
Ian Yates (Tuts+ Web Design Editor)
I have nothing to add to Ian, so we can move on here.
Eager
Zack Bloom and Adam Schwartz run Eager.io, it’s a web service which provides plugins every website owner can use no matter if they are code-savvy or not.
If you decide that you want to apply the glorious css-hack that the SmartUnderline plug-in is, but don’t have the expertise to code it yourself, you have to do the thing. You sign-up for Eager and become a member, then you can install their plugins and start to sprinkle magic snippets all over your site.
A word of warning: don’t overdue it, you’re page performance might suffer.
Currently Eager offers 13 plugins:
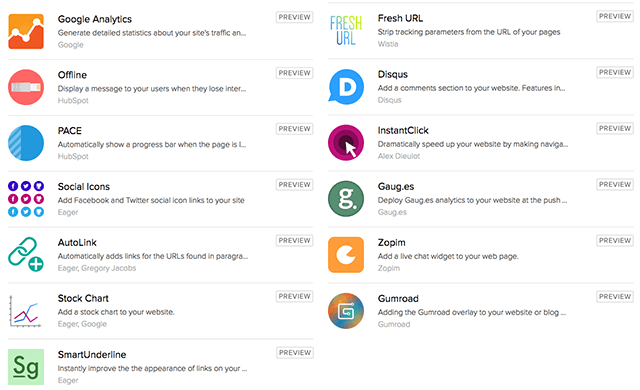
… and lastly it is:
Free forever if you join now
Any app you add to your website during our Beta period is free for life. So strike now while the iron is hot!
Filament
Filament also provides extensions that everybody can use on their own site.
WE WANT A BETTER WEB
We’re a UX and Design company, so design and usability is our way of life. However, that’s not true for most people. Great design is a process, and typically it’s expensive. This is why we’re dedicated to building a better web by making great design more easily accessible to websites and their owners.
A better web is our goal with Filament
Here’s a link to a Tuts+ article who should get you up and running: Filament: Website “Plugins” That Work Everywhere
Filament have 6 apps ready and another 8 which are yet to be released:


