Bridging The Gap Between Path Finder And Finder
There’s one application on all the Mac’s out there that everyone uses: the file browser - on Mac OS X better known as the Finder. It hasn’t seen any major updates since I’ve become a Mac user which was shortly after Mac OS X v10.4 Tiger was released in April 2005.
After making the switch it took me about one year until I felt at home. But even today, after almost 8 years and many small refinements by Apple, I think the Finder could be much more than what it is today.
Like any good software aficionado I tried many alternatives and extensions and for now I’ve settled with this setup:
- Apple Finder
- TotalFinder by BinaryAge1
- Path Finder by Cocoatech
I had tried using only Path Finder, but for small tasks it was like cracking a nut with a sledgehammer. So I went back to Apple’s Finder. The thing was, I’ve become quite accustomed to having Path Finder around for bigger tasks.
Nowadays I use both of them with a little help of Keyboard Maestro. Here’s my setup for switching Finders and bringing some of the power of Path Finder to Finder (vanilla version).
The Macros
Most of the macros work with a “If Then Else” action: If the application at the front is Finder then do X, otherwise select menu entry Y in Path Finder.
All the macros are available as a download.
If you install all downloaded files the following groups (prepended with a hash mark) will be generated at the top of your library:
- RocketINK
- RocketINK - Labels Palette
- RocketINK - Path Finder: Browser Sets
Some macros have no shortcut assigned to them. You have to setup a shortcut which makes sense to you.
In addition, here’s another suggestion: create a group that is only active in Finder and Path Finder and put the macros in there.
If you feel like organizing your macros have a look at this post.
Copy Path
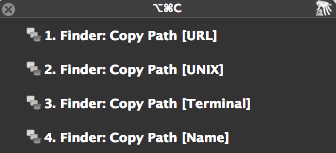
Path Finder has an option to copy the path of the selected files to the clipboard. With TotalFinder you also get this build-in. What I wanted was support for Finder too and a palette that pops up no matter in which Finder I’m in. As you can see in the screen shot I set ⌥⌘C to every macro and renamed the macros in a numerical order.
I have placed Gabe Weatherhead’s file rename macros in that palette too.
Labels
In the Finder you have no real menu entry for setting a label, at least the label entry is not accessible in Keyboard Maestro’s menu action. AppleScript to the rescue:
try
    tell application "Finder"
        repeat with f in items of (get selection)
            try
                set label index of f to item 8 of {2, 1, 3, 6, 4, 5, 7, 0}
		-- No color (0), Orange (1), Red (2), Yellow (3), Blue (4), Purple (5), Green (6), Gray (7)
            end try
        end repeat
    end tell
end try
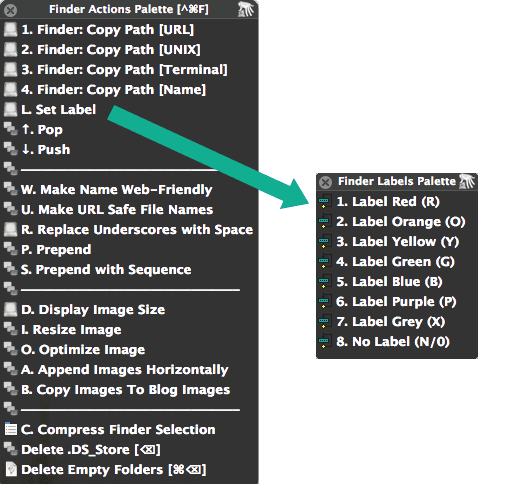
When I want to assign a label to a selection, I fire up my “Finder Actions Palette” ^⌘F and type L for label to trigger my separate “Labels Palette”:
Currently, to call up a palette from within a palette you need to work with string triggers which I explained in this post (the next version of Keyboard Maestro has this functionality build in).
The “Trigger Set Label” macro is inside the download folder. You just have to setup your own hot key and match it with the “Labels Palette”.
Side note: I added some more stuff from Gabe Weatherhead like the prepend macros, resize image and the push/pop. Visit Gabe’s blog if you’re interested in these, they are not included in the download pack. The display image size macro accidentally slipped into this post (I was a bit in a hurry, it should have been in here).
Symlink
Aliases work in both Finders the same way. You press ⌘L and get an alias. But what if you want to have Path Finder’s symbolic links available Finder too?
In Path Finder the default to create a symbolic link is ⇧⌘L (unless I made that changed myself - you’ll figure it out. You’re smart). So the macro is set to that hot key by default.
To use a symbolic link in Finder via a palette one way to do it is with shell action. However, by using a service we gain the benefit of having the option to create symlinks in the contextual with our mouse too. Since I use symbolic links all the time with Dropbox I want to keep them around in more places than just a palette.
If you already know the little shell command ln -s {source} {symbolic-target} you could whip up a service yourself with the help of ThisService from waffle software. Or, much more simple: you download SymbolicLinker Service from Nick Zitzmann.
Mirroring functions
For me it’s nice to have those functions mapped to the same shortcut. So, here’s what I use:
Show Selection in Finder/Path Finder
This macro is very basic, yet it is one of my favorites. Press ⌘R and that other Finder will open with the file you had selected. I use it all the time if I need the power of Path Finder or vice versa, the simplicity of Finder (– it doesn’t work that great if you’ve selected a folder).

Show Package Content
The idea is the same as before. Press ⇧⌘R in a Finder or Path Finder window on a package, bundle or application and the macro shows you its content.
Other Candidates
⌥⌘Stoggles the sidebar in Finder by default. And, with this macro it toggles the dual browser mode in Path Finder.⌥⌘Y“Go to Downloads” in both Finders.
Go nuts and add more.
Path Finder Extras
I got another group which is solely for Path Finder.
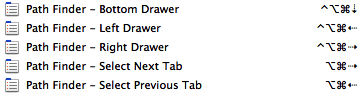
Remapped Shortcuts
I mapped the following shortcuts to navigate inside it (customize them to your needs):
Browser Sets
And lastly, another one of my favorites: a macro which I’ve assigned to one of my global palettes so that I can reach this palette from anywhere. It let’s me choose one of my predefined Path Finder browsers:
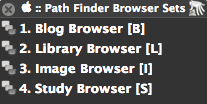
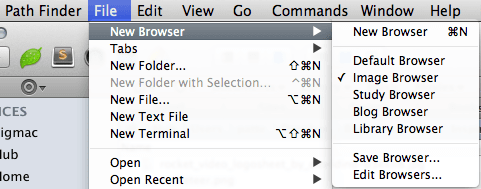
Saving customized versions of the Path Finder browser is one of the most powerful features of the application. This way you have an easy way to switch between them.
Set up your own ones here:
The macro is set to close the active Path Finder window first and then open the chosen browser set. If you don’t like the window to be closed just delete this part of the macro or set it to inactive.
-
TotalFinder is a great add-on which lives on top of the Finder. It’s not the subject of this post, but I highly recommend to check it out if you don’t know it. It’s similar to XtraFinder which I mentioned earlier. ↩