Image Manipulation Series - Markdown Image Links
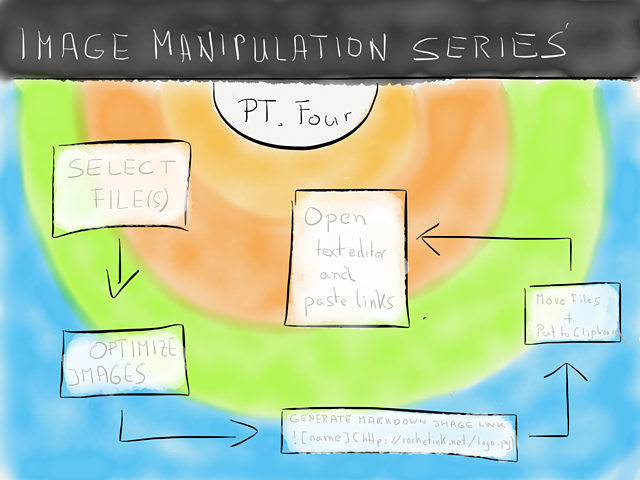
Image Manipulation Series
Part One: ImageMagick
Part Two: Binaries For Optimization
Part Three: Keyboard Maestro Image Editing Suite
Part Four: Markdown Image Links
Hi there, it’s time for another small addition to the image series. This could be useful for those of you running a static site generator. I hope it might be useful for some other stuff I haven’t thought about, since we’re static site guys are a small bunch of strange people.
We already have a ton of helper macro from the last post. So, let’s put a couple of those to good use. This macro generates Markdown image links, optimizes the images, moves them to the image folder of your blog and pastes the resulting links in the editor you currently use.
Setup
All you need for this to work is the helper macros from the third part of the series and to fill in the four variables to fit with the system of your blog:
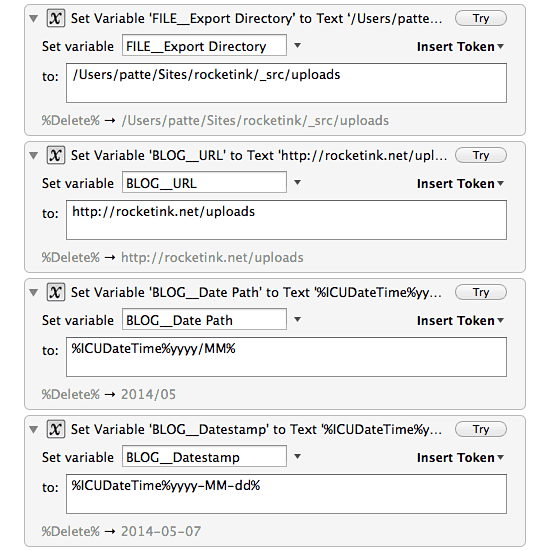
The “Date Path” variable gets used to file the image in your sites local image folder (“Export Directory”) in a year and month tree and to generate the output URL for the Markdown link. The “Date Stamp” variable gets prepended to the file name. The resulting markdown image link is for the screen shot above is:

I’d put the variables in the SETUP helper macro. too, so they’re out of the way. Same goes for the variables in the which delete those variables (to have a cleaner variable library).
Lastly, the AppleScript which tries to figure out the text editor you currently use might need some additions. In the second line add (or remove) your favorite editors.
To be more specific, edit this line:
set appList to {"nvALT", "FoldingText", "Byword", "Mou", "Sublime Text", "MultiMarkdown Composer"}
The Macro
Here’s a run-through how the macro is set up:
Step Number One - The Custom Prompt Dialog
The prompt…
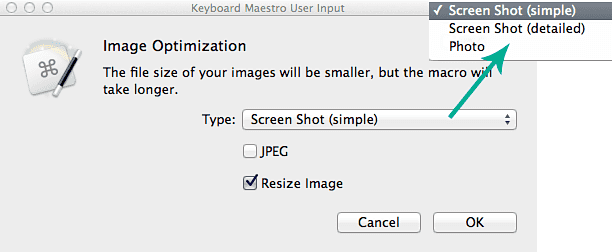
… which translated to this in Keyboard Maestro:

First, we need to define the image type. I have setup three different types:
- “Screen Shot (simple)” which translates to we’re dealing with PNG images and the quality setting can be low since there are not much colors and for the most time no other graphic elements.
- “Screen Shot (detailed)” is for screen shots with a rich UI. PNG and crisp (i.e. not much compression).
- Photos.
For photos I forced the JPEG format. So everything that isn’t a JPEG already will get converted to one.
Second, there’s an option to output a JPEG. This is just for those rare cases when you make a screen shot of something like the Photoshop startup image… which shouldn’t really be uploaded as a PNG.
The third and last option which is checked by default is to resize the images. It uses the default width you setup in the SETUP helper macro.
Step Number Two - Loading The Variables
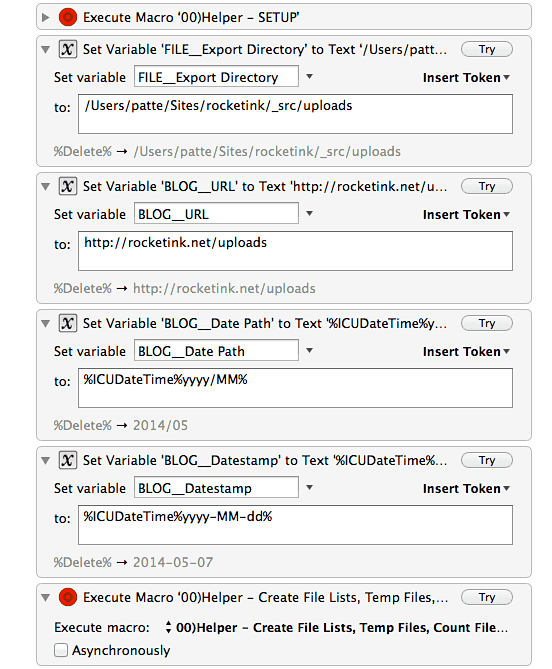
Along with the SETUP helper variables, your variables for the paths and date another helper macro gets executed which puts the selected files in /tmp/images/ directory. The last helper also performs a couple of other task we don’t really need in this macro. That’s the drawback only drawback… but hey, it’s a modular setup and I promise you won’t feel the clock ticking.
Step Number Three - Act On The Prompt Options
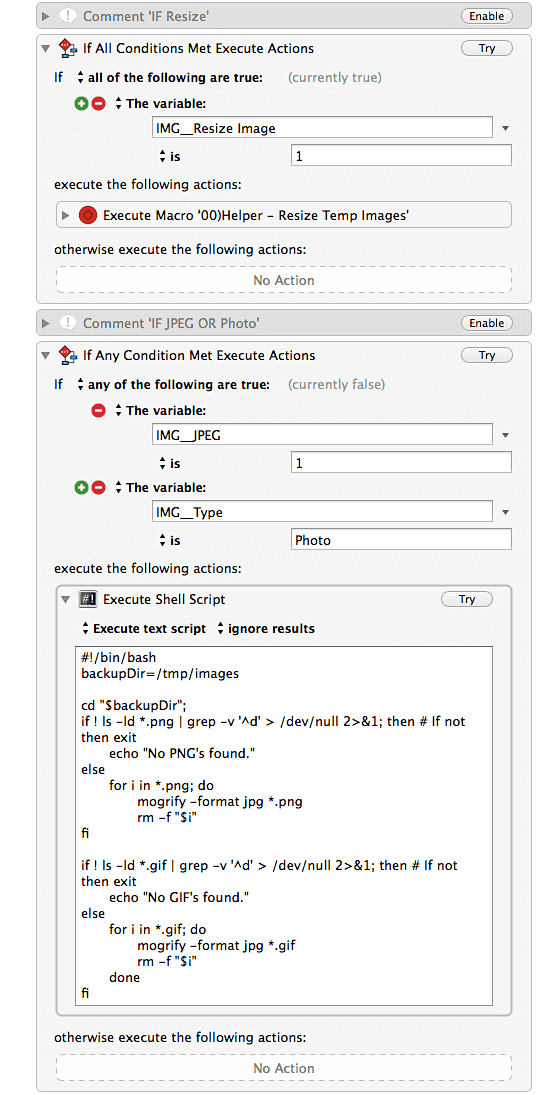
If Resize was checked in the prompt dialog all images get resized. In addition, if you selected “photo” as a type or chose “JPEG” all your images get converted to JPEG’s.
For the resizing we use our “resize helper macro”. The conversion to JPEG is done via the simple ImageMagick mogrify script we had in part one of this series.
Optimize
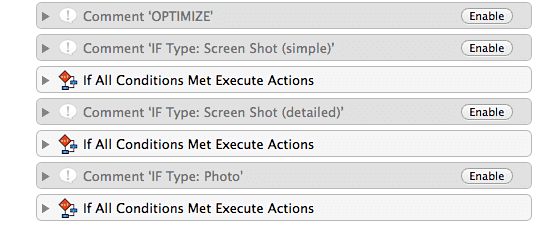
Sine we’re going to upload these images to the Internet this step isn’t optional – it only makes sense at this point.
There are three IF conditions to check for the type of photo you selected and trigger specific optimizations. I copied all of them from the optimize helper macro and separated them.
The differences:
- Screen shots (simple) uses
pngquant --quality=55-69 - Screen shots (detailed) goes for
pngquant --quality=95-98
Both of them run the rest of the optimization binaries from part two (of this series).
For JPEG’s we use JPEGmini.
Step Number Four - Moving The Files & Creating The Link
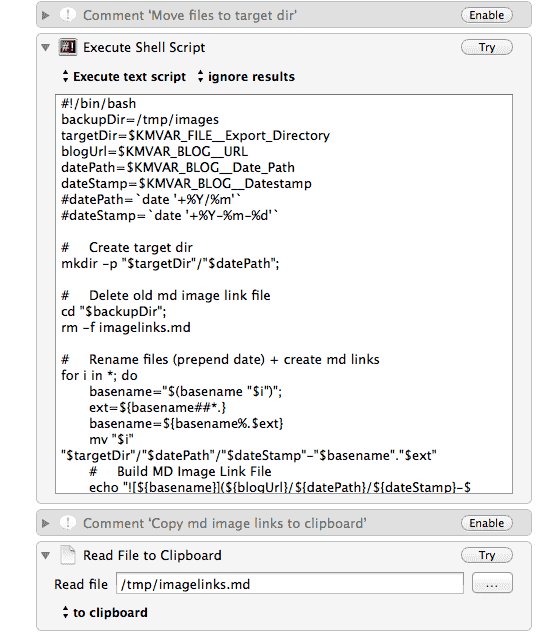
This bash script does what the three comments indicate; afterwards the created imagelinks.md file gets placed in your clipboard.
Step Number Five - Open The Text Editor And Paste The Link(s)

I use this macro while writing a post, so an editor is always open… this is kind of another dependency: have an editor open (or otherwise your links will just end up in the clipboard).
The AppleScript below checks which of the editors in appList are currently running and if more than one is running it will prompt you to choose one.
set activeEditorsList to {}
set appList to {"nvALT", "FoldingText", "Byword", "Mou", "Sublime Text", "MultiMarkdown Composer"}
--    Generate variable with running apps
tell application "System Events"
    set activeProcesses to (name of every process)
end tell
--    Generate list of running text editors
repeat with appName in appList
    if appName is in activeProcesses then
        set end of activeEditorsList to appName
    end if
end repeat
--return activeEditorsList
set editorCount to count activeEditorsList
if editorCount = 1 then
    return item 1 of activeEditorsList as text
else if editorCount > 1 then
    activate
    return choose from list activeEditorsList
else
    return "cancel"
end if
If none is running the links will end up in your clipboard, a notification informs you that there is “No Editor found!”, the variables get cleaned-up and the macro ends.
If an editor is found it gets activated and the links get pasted to the current cursor position (no selection gets overwritten).