April 22, 2014
Image Manipulation Series
Part One: ImageMagick
Part Two: Binaries For Optimization
Part Three: Keyboard Maestro Image Editing Suite
Part Four: Markdown Image Links
Outline
In the second part we are dealing with the next part of our standard suite – we’re still in the middle of setting the table for the macros. Our library is already packed with ImageMagick which is a great tool for shaping your images. But what we really want before our images ready to be uploaded or shared is to get them as small as possible. It’s the year 2014 and size still matters with all the mobile devices on a limited data “flat-rate” which access your site. In my book compression is one of the top three key factors of optimization to boost the load time of your page.
What we learn in this part is:
- The basics about popular image formats and when to use which one.
- What binaries to use.
- How to install them.
- Basic commands and how to set the compression to a maximum for best results.
Introduction
There are a lot of image formats out there. Before we jump into getting our compression started it’s always a good idea to see behind the curtain. Having a basic knowledge of what exactly we are dealing with is key. You don’t jump into a car and just drive away – so here’s your drivers license theoretical test. This is by no means meant to be a scientific, in-depth explanation, it’s rather me summing it all up in my own words.
I’m trying to cover the most popular formats in this introduction, outline their pros and cons and explain when I tend to a certain format. This is basic stuff, if you already know how to drive a truck feel free to proceed to the next section.
Bitmaps And Vectors
Bitmap images are made of pixels aka a lot of small dots in different colors. When you view them at a distance or move away from the picture these dots look like they are one picture. Your retina smooths out everything for you.
Here’s a picture I took from Lincoln in Dalivision by Salvador Dalí in the Dalí museum in Figerues (Spain):
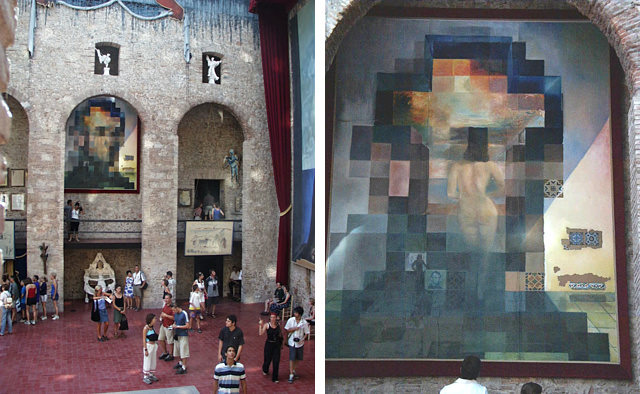
The artist used this optical illusion to create two images in one painting. From the corridor on the other side of the hall you can see his version of the classic Abraham Lincoln portrait. The closer you move up more details of his mosaic collage surface and show you the naked buttocks of his muse Gala.
Due to this effect, there’s almost no problem when downsizing JPEG’s. The big drawback is, they don’t scale up well at all.

Left picture: by unidentified (Christie’s, LotFinder: entry 5176324) [Public domain], via Wikimedia Commons
The left side shows you the normal image, on the left side is an enlarged version (just picture yourself standing right in front of a wall where this picture is hanging… only 20 times the original size…. You could count the pixels if you get bored).
Vector images are nothing like that. They are pure math, so to speak, and consist of points, lines, curves and shapes. If you enlarge or shrink a vector image only the mathematical co-ordinates get adjusted. The result is that the image stays sharp all the time, no matter the size.

The image above is one of the mockups for the Der Ubercast logo. You can see that the text and graphical elements are still sharp as a blade.
Lossless And Lossy, Images And Compression
Since the utilities which we will set up only work with a limited group of file formats, the only lossless image format we’re dealing with is PNG. The same goes for JPEG and GIF; those are the lossy file formats we will be able to compress.
A lossless image retains all of a files data – every singe 0 and every 1 is kept alive. Hence the images tend to be much bigger.
Lossy images don’t keep every “bit” of an image. Different systems and algorithms try to be smart about what to get rid of when saving a file and targeting a certain file size/compression level/overall quality. Do this over and over to a lossy image and it will undergo a metamorphosis… becoming more and more like Frankensteins monster every time you hit save. That’s also why you should archive your original artwork in a lossless format.
The same goes for compression. An image which gets compressed lossless can be recovered any time. It’s a non-destructive act which only compresses or encrypts a file. An image which undergoes a lossy compression can’t. Some information will get lost and your image isn’t the same.
Usually the first step of optimization algorithms is to pass the pixels through a lossless arithmetic transformation: (delta) filtering. Then they are transmitted further as a byte sequence. Filtering itself doesn’t reduce the size of the data (aka compress it), but it aims to make your pack of zeros and ones more compressible.
Tip: on the official site of OptiPNG is “A guide to PNG optimization” which goes thoroughly into all possible details of PNG compression and explains it far better than I could do here.
In general it can be said that the binaries we will use are smarter than your favorite image editor when it comes to compression. They are really good at stripping out redundant information.
Use Cases For Bitmaps
Bitmaps are great for photo-realistic images or photos. Essentially, everything rich in detail is suited to be published as a Bitmap. Popular formats are JPG, GIF, TIF, PNG and PSD (although a Photoshop file could contain vectors nowadays).
For web publishing most images are 72 DPI (dots per inch). Most common displays can’t handle more DPI so you can save some serious weight. However, with high pixel density displays on the rise nothing really changed so far. If your website has dozens of pictures which are twice the size it will impact the loading speed and visitors from mobile devices which are on 3G/LTE likely won’t shake your hand and say thank you for loosing a big chunk of their limited data “flat-rate”. Most content (read pictures) are still 72 DPI Bitmaps. A good practice is to compress Bitmap images before publishing to the web.
For print a higher DPI Bitmap with at least 300 DPI provides enough density to look good. Images for print don’t need to be compressed.
Aside from the resolution there are other factors that could sway me into using the one or the other format.
GIF’s (Graphics Interchange Format) are ancient (and if you’re interested in their cultural history check out this Mashable article). I tend to use them only for animated images be they pure fun shoots or tutorial-like screen shots. I don’t see me using them in anything web design related anymore. Now that most things can be done via CSS there’s no need for them. GIF’s were once a good alternative due to their small file size and transparency capabilities for decorative elements or fillers. In print the have no place – the poor things do only sport 256 colors.
JPEG’s - even if they are lossy - are a great all-rounder. They feel right at home in print and web design. Although I wouldn’t really pass them on to clients who need something for print. If they by accident save the file over and over they quality would suffer.
PNG (Portable Network Graphics) are somehow my favorites. I guess it’s because the text is always more sharp and readable than when using a JPEG. They are ideal for screen shots and if compressed they are most times even smaller than JPEG’s. They are also the way to go if you want to preserve the transparency of an image. These days I convert most of my static GIF’s to PNG files since they offer a better compression level.
For clients I’d use TIFF (Tagged_Image_File_Format) files if it’s a bitmap and EPS (Encapsulated PostScript) if it’s a vector. The are a crowd pleaser: lossless, can be compressed and are usually preferred.
Use Cases For Vectors
Vectors shine at being razor sharp. The aren’t as feature-rich as photographies; they don’t have as many colors and shades. Due to their mathematical nature they a relatively small in size.
In web-publishing we recently start to see them more and more as logos. Which makes sense since they scale nicely whatever display you put them on – be it a high-res or a standard 72 DPI monitor.
The advantages in print are obvious: a vector graphic can be scaled to any size. It can end up on a letter, a T-Shirt or on a gigantic billboard. You only need that one file whilst a Bitmap must be provided in the respective resolution to still look good.
Most times vector graphics don’t get compressed, but it is possible. Popular formats are EPS, SVG and AI.
This is as deep as I want to get into vectors here since the I see no need for compressing them at this point in time. From now an all you read will be addressing bitmaps.
Binaries For Optimization
All of the utilities mentioned here compress your images. They come with only a handful of options… which again translates to “don’t be afraid of the shell”: what these utilities do is complex, but using them isn’t.
Most of them let you influence several simple factors like, do you prefer a better compression over faster compression (and vice versa) or what should get appended to the file name (e.g. demo-opt.png) and so on. In the case of lossy compression there’s likely to be an option to set the quality, too.
The goal of downloading all these binaries is to have a versatile collection that exactly mimics what ImageOptim and ImageAlpha do and bring it to the command-line for easier scripting and macro building.
In the next part of the series we will take JPEGmini with us to have the best of JPEG compression on our team, too.
Like yesterday, to get you started you use the demo files download and put it on the desktop.
(1) PNGQUANT
pngquant is a command-line utility and a library for lossy compression of PNG images.
The conversion reduces file sizes significantly (often as much as 70%) and preserves full alpha transparency. Generated images are compatible with all modern web browsers, and have better fallback in IE6 than 24-bit PNGs.
PNG is typically known to be a lossless image format which preserves all image details, even minuscule ones. The problem is, those tiny details can costs you several kb’s.
pngquant is the only tool we will use that offers lossy compression of PNG images. You can grab the latest Binary for Mac OS X (v2.2.0) from the official website. However, if you have Homebrew installed you should put it to use.
brew install pngquant
There’s also a Macports package but it’s version 2.1.0.
If you copy the file by hand to your /usr/local/bin (or wherever) you might have to make it executable with chmod +x pngquant.
Check out the manual section on the website and/or type pngquant -help in the Terminal which will show you the 7 options it comes with.
A GUI wrapper for pngquant is the app ImageAlpha – it doesn’t support batch processing yet and for this use-case refers to pngquant. They do a good job at explaining how it works here. By the way, here’s a thread on HackerNews which also goes into detail why it does a good job at what it does.
If you plan on combining multiple optimization tools and applying lossy compression, the smart thing to do is to start with the lossy compression first because then you have a solid base for the lossless compression tools to work on.
This is a basic pngquant command:
pngquant --quality=65-80 ~/Desktop/demo/1.png
It will add the optimized file with -fs8 appended to the name to the source folder. The quality setting can be adjusted to your liking – for some screen shots you can go even lower. You could also use it on the whole folder:
pngquant --quality=65-80 ~/Desktop/demo/*.png
Or, overwrite the original files:
pngquant --quality=65-80 --ext .png --force ~/Desktop/demo/*.png
Documentation: man pngquant or the official site.
(2) PNGCRUSH
Its main purpose is to reduce the size of the PNG IDAT data-stream by trying various compression levels an PNG filter methods. It also can be used to remove unwanted ancillary chunks, or to add certain chunks including gAMA, tRNS, iCCP, and textual chunks.
Our first optimizer, pngcrush, reduces the size of your files around 60-70% (,… if you’re lucky). You could download a pre-compiled build of the latest version (v1.7.73) from this source. Alternatively:
brew install pngcrush orsudo port install pngcrush
If you really want to compile it yourself then…
- Download it from the source (see above)
- Open the Terminal (
/Applications/Utilities/) and navigate to the directory of the extracted folder by typing cd and simple dragging said folder to the terminal, for instance: cd ~/Downloads.
- Now extract the file with
tar -xvzf pngcrush-1.7.73.tar.xz and cd into this folder again.
- The next step:
make = this compiles the downloaded source code to a binary.
-
The default path for binaries under OS X is /usr/local bin/. Let’s copy our file to that destination – putting it there will make sure that you can use it without additional steps (okay, you have to restart your Terminal session, but that’s it):
sudo mv pngcrush /usr/local/bin/
Since it’s ready now, why not give it a whirl. Open Terminal.app and cd into the demo folder:
cd ~/Desktop/demo
pngcrush -reduce -brute 1.png 1-opt.png
If you want to replace the original file one way to do it is to rename the output file right after the command:
pngcrush -reduce -brute 1.png 1-opt.png && mv 1-opt.png 1.png
But wait… that’s not all pngcrush can do. It might take a bit longer, but when using this tool you really want to crank up the compression.
pngcrush -rem allb -reduce -brute -l9 1.png 1-opt.png
It’s the most drastic setting I know of… if you have other suggestions, don’t hesitate and tell me.
If you’re tired of specifying an output file you can use the -e <ext> option:
pngcrush -rem allb -reduce -brute -l9 -e -opt 1.png
If you found a setting you’re comfortable with there’s practically no need to change your command.
Documentation: man pngcrush or man pngcrush.
(3) PNGOUT
PNGOUT optimizes the size of .PNG files losslessly. It uses the same deflate compressor I wrote for KZIP.EXE. With the right options, it can often beat other programs by 5-10%. That includes pngcrush -brute, optipng -o7, advpng -z4, etc.. PNGOUT is a great tool for optimizing the size of web pages or squeezing game content onto mobile devices. Almost all .PNG files on my website were optimized with PNGOUT.
pngout comes pre-compiled, you can download the binary for OS X from here. There’s no homebrew package for it and you can go ahead and just download it from the website.
Drag it into your /usr/local/bin folder (and mayhaps make it executable `chmod +x pngout… I don’t think you need to).
It’s super easy to use:
pngout 1.png 1-opt.png
or to replace to original file:
pngout 1.png
The option for the best compression is also the default /f0 – no need to change anything.
Documentation: man pngout or the PNGOUT Tutorial by Ken Silverman aka the creator of pngout.
(4) optipng
OptiPNG is a PNG optimizer that recompresses image files to a smaller size, without losing any information. This program also converts external formats (BMP, GIF, PNM and TIFF) to optimized PNG, and performs PNG integrity checks and corrections.
This one doesn’t come pre-compiled, but you can install it via Homebrew:
brew install optipng
Or, if you have it or don’t want to do it the hard way and compile it yourself. If you choose to go that route…
- Download it from here as a zip or tar file.
- In your Finder, click the downloaded file and uncompress it.
- Now open the Terminal and navigate to the directory of the extracted folder by typing
cd and simple dragging the folder called optipng-0.7.5. into the Terminal. Press return. Your now in said directory.
- Type
./configure and press Return again.
- As a last step, type
sudo make install and press Return.
I picked the “hardcore compression setting” directly from the man page and haven’t added any other option:
optipng -o7 -zm1-9 1.png
Documentation: man optipng
(5) ADVPNG
The main purpose of this utility is to recompress png files to get the smallest possible size.
To compress the files this utility uses the following strategies:
• Remove all ancillary chunks.
• Concatenate all the IDAT chunks.
• Use the 7zip Deflate implementation.
advpng can be downloaded from the website, but you have to compile it just like explained above… or… with Homebrew:
brew install advancecomp
As far as my default setting goes, I tend to use this:
advpng -z -4 1.png
I don’t use the --iter <number> option because it takes its precious time, but the results are often not there.
Documentation: man advpng or the official site.
(6) JPEGOPTIM
Utility to optimize jpeg files. Provides lossless optimization (based on optimizing the Huffman tables) and “lossy” optimization based on setting maximum quality factor.
Now we entering the world of JPEG’s. Later on we rely mainly on JPEGmini to do the most work for us (which offers no command-line version), but nonetheless we can use jpgeoptim to pre-process our JPEG’s a tad and optionally choose to do this lossy, too.
jpegoptim can remove non-essential information like comments, color profiles, extra bytes at the beginning or end of a file, plus assorted other bits and pieces.
Again, this one isn’t pre-compiled. But…
brew install jpegoptim
… will get you up and running.
Since there are no demo JPEG’s in the demo folder we could use ImageMagick from part 1 of this series to generate some:
mogrify -format jpg
… and then do a lossless compression…
jpegoptim -pt --strip-all 1.jpg
or a lossy one:
jpegoptim -pt --strip-all -m60 1.jpg
Documentation: man jpegoptim or man page.
(6) GIFSICLE
Gifsicle is a command-line tool for creating, editing, and getting information about GIF images and animations. Making a GIF animation with gifsicle is easy.
The last player in our optimization toolkit is gifsicle. Which will work on your gif files to make them smaller.
brew install gifsicle
I hesitated to add this to the list, since I tend to convert all of my non-anigif’s to png’s (and gifsicle doesn’t work well with those). Anyway, this way all of your compression needs will be satisfied.
gifsicle -b --optimize=3 your-gif-i-dont-have-one.gif
Documentation: man gifsicle or the official website.
The Basics Of Building A Script
If you want to edit more than one file at a time the easiest way to do it is to put it in a script. Remember the loop from series one? We can use it to pipe our files through a whole folder like this:
for i in ~/Desktop/demo/*.png; do convert "$i" "${i%.png}.jpg"; done;
Our script will take all files in the demo directory on your desktop, copy them to a temp folder, optimize them and put the optimized version in a folder called “optimized images” on your desktop.
#!/bin/bash
#   Variables
backupDir=/tmp/images
targetDir=~/Desktop/optimized\ images
cp ~/Desktop/demo/*.png "$backupDir"
# Optimize PNG's
function optimizePNG {
	# Lossy (good) -- for simple screen shots change the value to 65-80
    pngquant --quality=95-98 --iebug --ext .png --force "$i";
    # Lossless
    pngcrush -reduce -brute -l9 -e "$i" "${i%.png}-crushed.png" && mv "${i%.png}-crushed.png" "$i";
    pngout "$i";
    optipng -o7 "$i";
    advpng -z -4 "$i";
}
# Optimize JPG's
function optimizeJPG {
	# Lossy
    #jpegoptim -pt --strip-all -m60 "$i";
	# Lossless
    jpegoptim -pt --strip-all "$i";
}
# Optimize GIF's
function optimizeGIF {
    gifsicle -b --optimize=3 "$i";
}
cd "$backupDir";
# Check if files exist (ignore directories)
if ! ls -ld *.jpg | grep -v '^d' > /dev/null 2>&1; then # If not then exit
	echo "No JPG's found."
else
	for i in *.jpg; do
	    # JPG OPTIMIZATION
		optimizeJPG;
	done
fi
if ! ls -ld *.png | grep -v '^d' > /dev/null 2>&1; then # If not then exit
	echo "No PNG's found."
else
	for i in *.png; do
		optimizePNG;
	done
fi
if ! ls -ld *.gif | grep -v '^d' > /dev/null 2>&1; then # If not then exit
	echo "No GIF's found."
else
	for i in *.gif; do
		optimizeGIF;
	done
fi
for i in "$backupDir"/*; do
	# Append "-opt" to all images
	basename="$(basename "$i")"
	ext=${basename##*.}
	basename=${basename%.$ext}
	mv "$i" "$basename"-opt."$ext"
done
# Create an optimized images folder on the Desktop and move all optimzied images into it
mkdir "$targetDir";
mv *.png "$targetDir"/
Save this code as “demo-opt.sh”, make it executable chmod +x demo-opt.sh and give it a go in the Terminal app.
App-Tip: CodeRunner is a pretty nice OS X app to test all kinds of scripts.flat-rate
Feel free to send me a your optimizing scripts and feedback. I’m always looking for ways to improve my workflow and I’m generally curious to see what others build.
Documentation & Links
Regarding ImageOptim: Jamie has a superb wrapper for image compression and it would be a shame not to mention it here.
It’s an alternative for those who just seek for compression. I stumbled upon it when writing my Hazel workflow. I decided to stick to my own set of scripts because I already run them on my server (where there is no AppleScript) and the idea behind the CLI was the same thing I already set up (i.e. bring ImageOptim, ImageAlpha, and JPEGmini to the command-line). In addition, it’s also easier for me to maintain and expand my scripts this way. Lastly, I never got JPEGmini to work with it. I upgraded from JPEG mini Lite via in-app purchase which ImageOptim-CLI doesn’t support. Later on I got JPEGmini Pro which currently isn’t supported either. Jamie is working on fixing this.
In short: if your in search for compression (and don’t want any of the upcoming extras), don’t want to install seven different binaries and rather remote control the GUI-versions, then ImageOptim-CLI could be the thing for you.
Check out the stats why the tools we choose are the best at hand.
April 21, 2014
Image Manipulation Series
Part One: ImageMagick
Part Two: Binaries For Optimization
Part Three: Keyboard Maestro Image Editing Suite
Part Four: Markdown Image Links
Outline
It has been awfully silent on RocketINK lately, I’m doing something about it and the first thing is to kick off a small series which deals with automating image manipulation. So, part one in this series is the introduction where we will set the table to have everything ready for the good stuff aka a sconverweet set of macros and scripts.
My mission here is to take away the fear of running some geeky image processes tool in the shell. The geeky UNIX based image toolset I’m referring to is ImageMagick. It’s indeed quite powerful and super versatile, but for basic operations you don’t need to know much and in this post I will walk you through the installation and show you some basic commands.
ImageMagick - The Swiss Army Knife
ImageMagick is my go-to utility for swiftly converting images to JPG or PNG, resizing them and to prepare them for sharing. I have it running on my beloved Uberspace server (actually it’s RMagick - a ruby version of it) for some automatic processing in the background and of course I still use it in combination with Hazel on my Mac.
Installing ImageMagick
The hardest part though is, to get ImageMagick installed on your Mac and to learn the basics. Gladly, since ImageMagick has been around for years, the Internet is full of useful examples. The good thing is, once you know what you want and which types of actions you repeat more or less often you’re set.
Option 1: Easy One-Click Installation
If you want to keep the amount of Terminal.app™ action to a minimum this is your lucky day. The guys over at Cactuslab have put together a installer which gets you started in no time:
To simplify the process of installing ImageMagick on Mac OS X, Cactuslab has put together an installer package. The installer puts ImageMagick into /opt/ImageMagick and adds it to your PATH by creating an entry in /etc/paths.d/.
Go download their ImageMagick installer for Mac OS X. You can go with any of the packages, for our purposes the one with Ghostscript would be the best choice since one of the ImageMagick commands is relying on it.
I’d still recommend using a package installer. It’s easier to maintain and sooner or later you will pay the command-line a visit (or two).
That said, this is as easy as it gets. Back in the days Apple hosted an installer on their official site in the Unix and open source section. Now Cactuslab got you covered. Note: there’s also an installer hosted on MacUpdate but judging from the comments I don’t know if it’s the most recent one.
Option 2: Homebrew
If you feel comfortable with the shell, Unix tools and alike you probably already have one of the more popular package managers like Homebrew, MacPorts or Fink installed.
Personally, I use Homebrew and I’d recommend using this method over the one-click solution. Using a package manager brings several advantages to the table, c.f. a straight forward process to update you ImageMagick with a simple brew upgrade imagemagick.
So, here’s step by step guide for installing Homebrew:
(1) Install the Command Line Tools in Mac OS X. I’ve heard that since Mavericks you won’t need to install Xcode from the Mac App Store upfront. I can’t confirm it since I already had Xcode installed, but you can give it a try; just open the Terminal.app (in /Applications/Utilities/) and type:
xcode-select --install
If you’re not sure if you might have already installed them you can check if you get a valid path by pasting xcode-select -p in the Terminal.
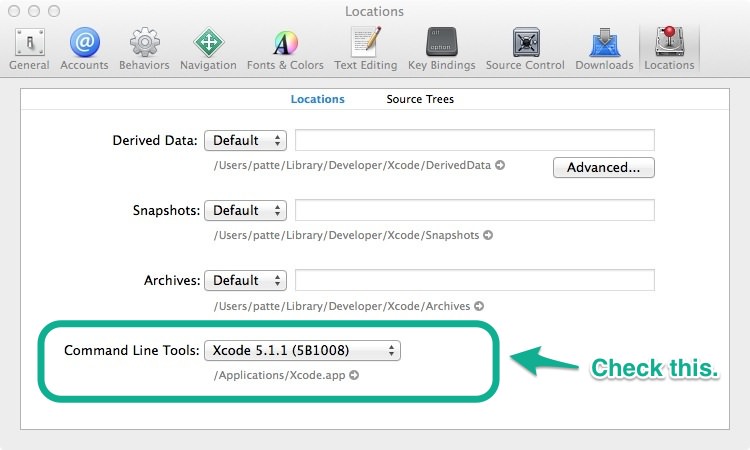
In case the trick without Xcode didn’t work it couldn’t hurt to check if the latest and greatest you just downloaded are actually selected:
(2) Install Hombrew by opening Terminal.app and pasting in the following:
ruby -e "$(curl -fsSL https://raw.github.com/Homebrew/homebrew/go/install)"
Some ImageMagick extras need XQuartz to be installed as well. To be on the safe side I suggest to go ahead and just download it from their page and install it.
(3) Optional: here are some basic brew commands:
- Check if everything is working:
brew doctor
- Update Homebrew:
brew update
- List all installed packages:
brew list
- Remove an app:
brew remove <app>
For the full list of commands check out the man page man brew. Homebrew keeps everything nicely tucked away in a separate directory (/usr/local/Cellar/) and then symlinks the files into /usr/local.
(4) Install ImageMagick:
brew install imagemagick
Option 3: MacPorts
On the ImageMagick website they officially recommends MacPorts. I’ve used Homebrew without a problem, but anyway, here’s the MacPorts guide:
(1) It’s the same as with Homebrew. Have a look at the step one above.
(2) Head over the the MacPorts site and download the installer from their download section.
(3) Open Terminal.app and type:
sudo port install imagemagick
Option 4: Fink
It’s been a while since I used Fink, but if you’re in that camp. A simple fink install imagemagick should do. If you haven’t installed Fink here’s the quick start guide.
Option 5: Install The Binaries Yourself
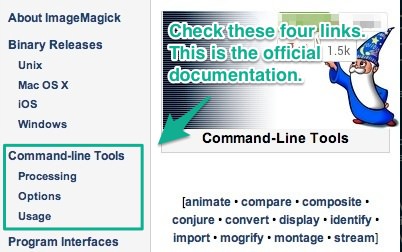
On the official ImageMagick website they have all the instructions you need to “Install from Binary Distribution” . Check out their tutorial if you’re a self-made man.
Testing The Waters – Basic Examples
These examples are some of the functions I’ll use in the upcoming macros and scripts. In case you want to modify those you first need to know what they do. I’ve been adding options to the macros which allow you to control certain aspects of a workflow, but I can only add this much. At some point it would get much to crowded.
This is why I wrote this reference section. If you grasp the basics it will be much easier for you to modify my macros or to write your own custom tailored workflows.
To get you started put a example folder called “demo” on your desktop and put some images in it or download this one.
If you downloaded the folder you now have these six images:
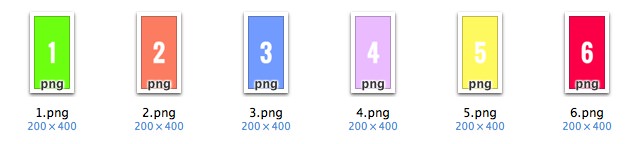
Open Terminal.app and cd into that folder:
cd ~/Desktop/demo
Where’s My ImageMagick?
First things first; you probably want to know where ImageMagic is located. Therefore type convert. Depending on the installation method you ImageMagick will be located at one path or another. Mine is at /usr/local/bin/ and if you went the Cactuslab route then yours should be at /opt/ImageMagick/bin/.
If you don’t get a valid path displayed then something went wrong with your installation or more likely the path isn’t linked to /usr/local.
In another post of this series you will need that path, now you know how to get it. In short: if you want to use a ImageMagick command (or script) in apps like Keyboard Maestro or Hazel you will likely need to specify the path first.
ImageMagick can do tons of things. I figured converting images from format A to format B is a common task, so most examples here focus around this aspect of image manipulation.
Converting A PNG Into A JPEG
convert 1.png 1.jpg
With the convert command you have to specify the name of the output file.
Convert All PNG’s To Sequentially Numbered JPEG’s
convert * demo.jpg
… will output demo-1.jpg demo-2.jpg demo-3.jpg …. With the asterisks (*) we say that we want to use all files in the current directory. It’s the same like writing this:
convert ~/Desktop/demo/*.png demo.jpg
That’s for the numbering out of the box. Still, we can do better. Especially if you plan to batch convert hundreds of pictures you may want to specify how many digits the sequence should have. We can use %02d like so:
convert * demo-%02d.jpg
This will output demo-00.jpg demo-01.jpg demo-02.jpg ….

Using %03d would give you demo-000.jpg, demo-001.jpg, ….
In case you want to start from a specific point you can do so by adding the option -scene <number>. In the example below we start from one instead of zero.
convert -scene 1 * demo-%02d.jpg

Mogrify, who?
mogrify is essentially the same as convert, but you can use it to keep the original file name when processing images.
To stick with the example from above our conversion command would look like this:
mogrify -format jpg 1.png
mogrify makes it easier to batch convert all files in a folder if you want to keep the original name.
mogrify -format jpg ~/Desktop/demo/*.png
If you wanted to do this with convert you’d have to wrap the command in a loop and run it on each file in the folder:
for i in ~/Desktop/demo/*.png; do convert "$i" "${i%.png}.jpg"; done;
The bottom line is, decide first how your output files should be named and then decide on which to use before ending up with a complicated script when you don’t have to.
Adding Optional Parameters
-quality <value>
Let’s say the really need some lightweight quick and dirty JPEG’s for sharing our latest and greatest which we rendered as a PNG. Often times a simple 1024x1024 px PNG image can weigh over 2 MB. In addition, we may just want a client to see the rough idea rather than show him all the glorious details which still miss the finishing touches. What I want most times is a low resolution JPEG for the first few drafts to steer us in the right direction (… this also tends to help keeping long discussions about prominent features which are still in the making down to a minimum. The intend is clear: this is a rough mockup.)
When using the value parameter 1 is the lowest and 100 is the highest:
mogrify -format jpg -quality 30 ~/Desktop/demo/*.png
or
convert -quality 30 -scene 1 *.png low-quality-%01d.jpg
Congratulations, all PNG files in your demo folder are now rendered as ugly bunch of JPEG’s.
-resize <width>x<height>
The resize parameter in its basic form allows you to shrink or enlarge images. The way resize works is, it keeps the ratio intact and enlarges the until the first criteria is meet.
Our demo pictures are all sized 200x400 px. When we use…
convert -resize 800x800 ~/Desktop/demo/*.png larger.png
… it will upsize our images to 400x800 px since the height first hit the 800 pixels mark.
This time we used convert instead of mogrify. If we would have used…
mogrify -resize 800x800 ~/Desktop/demo/*.png
… mogrify would have replaced all PNG files in the demo directory with larger versions.
If you only want to resize your image up to a specific width you can use -resize <width>. The same is possible with only using the height parameter. Here we’d have to add an “x” -resize x<height>.
convert -resize 800 1.png 1-larger.png
The dimensions of 1-larger.png would be 800x1600 px since we’re only specifying the height.
convert -resize x800 1.png 1-larger.png
With the command above we’d end up again with a 400x800 px image.
Resize with both parameter (width and height) is great if you have a mixed folder of landscape and portrait pictures and want to resize them to a certain threshold.
I often use it when shrinking images, c.f. the images in my blog shouldn’t be wider than 640 px and not taller than 800 px.
The thing is, when I’d go ahead do…
convert -resize 640x800 1.png 1-larger.png
… our demo images would get enlarged. I don’t want that. Gladly, there’s small trick which disables enlarging images. Add \> after the specifying the width and height.
convert -resize 640x800\> 1.png 1-larger.png
-append
You can append images horizontally or vertically.
convert +append *.png horizontal.png

convert -append *.png test.png

If you want a bit of padding between the images you have another parameter called -splice. Since splice will add this padding to each side of an appended image we would end up with a border on one site. To avoid this we have to crop the final image.
Horizontal version:
convert *.png -splice 10x0 +append -crop +10+0 horizontal.png
Vertical version:
convert *.png -splice 0x10 -append -crop -0+10 vertical.png
Keep an eye open open with the different -/+ signs. Another thing to keep in mind is that the arguments are lined up in a logical order:
1) convert *.png → convert will target these source files
2) -splice 10x0 → apply a padding to all files
3) -append → append all images horizontally
4) -crop +10+0 → crop after images got appended
5) vertical.png → write the target file with that name
So, depending on what you want you’ll have to pay attention where to put a certain option/parameter. If you wanted to resize the final image, make it a JPEG and modify the quality all this would go after the crop.
convert *.png -splice 10x0 +append -crop +10+0 -resize 320 -quality 33 horizontal.jpg
The example code above will shrink the final image. Unfortunately there’s a stumbling block: this also means, that your padding will shrink (-̩__-̩).
You can work around this if you resize the images first. But, you have to do the math… which gets annoying pretty fast. For instance if we wanted our 6 demo images to have the 10 px padding and the resulting image of an append action be 640 px, we would have to do the following calculation:
target width = 640
width per image = 200
amount of images = 6
padding = 10
x = (target width - (amount of images - 1) * padding)/amount of images
=> 98.3333
To check if this result is correct:
Final image = x * 6 + (5 * padding) => 640
Ergo, each image should get resized to 98.3333 pixels:
convert *.png -resize 98.3333 -splice 10x0 +append -crop +10+0 -quality 33 horizontal.jpg
Later on we will find out how to simplify this process with a script.
Documentation & Links
Of course the possibilities with ImageMagick don’t stop there. The official documentation is huge…
… and like I stated in the beginning there are literally thousands of pages on the Internet that will give you examples on how people use this toolkit for all possible kind of stuff.
Here are some links to get you started if you want to go beyond the basics: